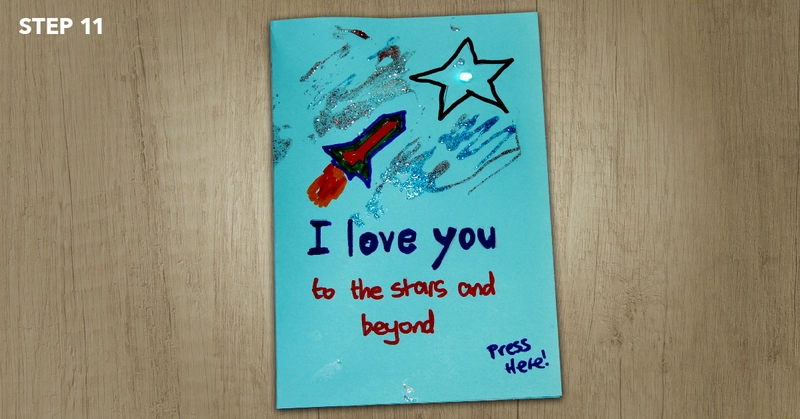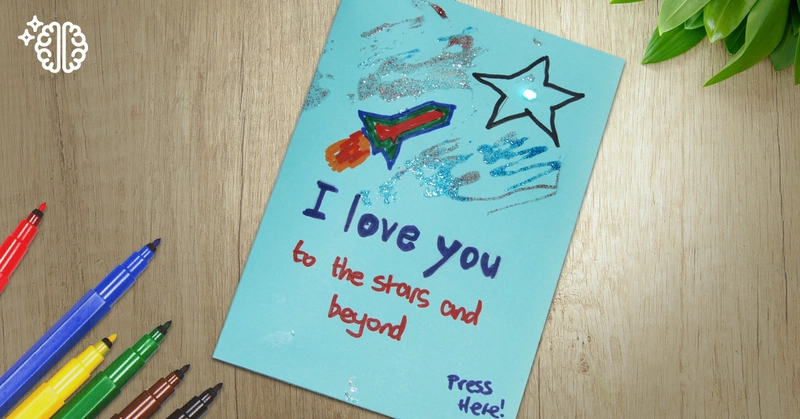
Save yourself a trip to the store and make your own light-up card to honour a special father figure in your life.
Light-up cards tend to be costly, but teaching your kids to make one themselves will save you money and allow them to add their own creative flair. Let's get started.
What you need
‣ A white LED (or any colour LED of your choice)
‣ 5mm x 10m copper tape
‣ CR2025 coin-sized battery
‣ 2 sheets of 240gsm A4 cardstock or similar
‣ Scissors
‣ Colouring pen or pencils
‣ Glue stick or double-sided tape
‣ Ruler
Creating your light-up Fathers Day card
Step 1
Fold both of your sheets of cardstock in half lengthways. Put one sheet aside until Step 11.
Step 2
Take the other sheet of cardstock and draw a design on the side of the card that will become the front cover. Make a small hole – the size of the LED – in the card in a place of your choosing.
The next two steps will map out where we will be laying the copper tape to make our circuit. The precise layout will depend on your initial design. For our example, the LED will be placed 4cm in from the edge of the card and 4cm down from the top.
Step 3
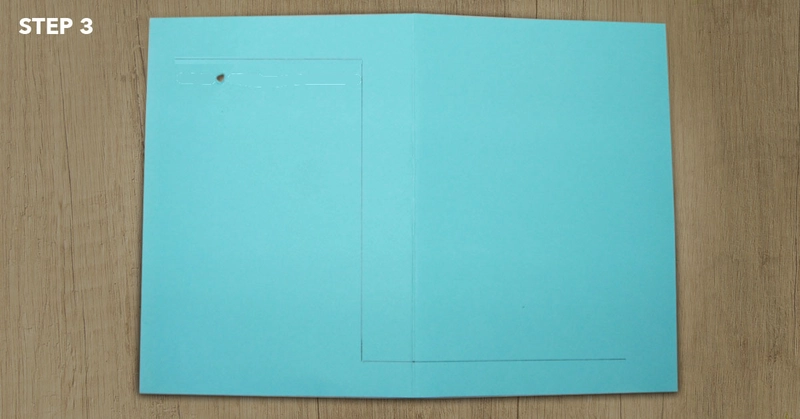
Take the card and turn it over so your design is face down and the inside is face up. Using your ruler and pencil, draw three lines as follows. For line 1, start 2cm in from the edge of the paper, pass 2cm above the hole you made and end 3cm from the fold in the middle of the card. For Line 2, draw a vertical line that starts at the end of the first line and ends 2cm from the bottom of the card. For line 3, draw a line from the end of the second line that goes across the fold and ends about 3cm from the other end of the card, making an 'L' shape as shown.
Step 4
Next, for Line 5, draw a line that starts 2cm below Line 1 that is 4cm long. Then draw another vertical line that ends 2cm from the bottom edge of the card, making an upside-down 'L' shape. This is Line 5 in the diagram.
Step 5
Using your scissors, cut a piece of copper tape that is about 3cm longer than the lines you drew in Step 3. For our project, that's a piece of copper tape that is 45cm long.
Step 6
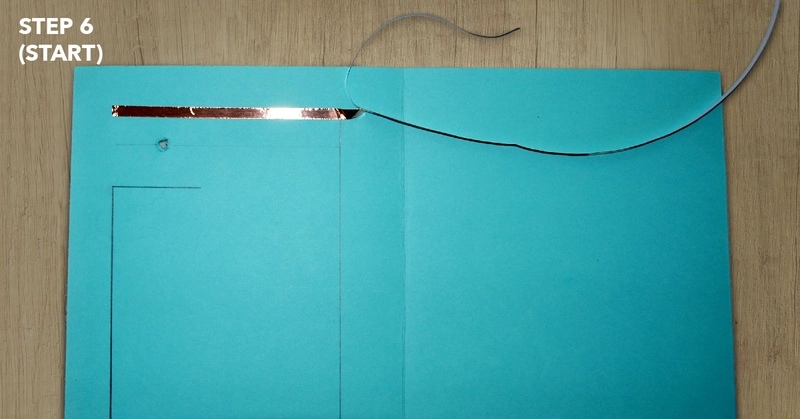
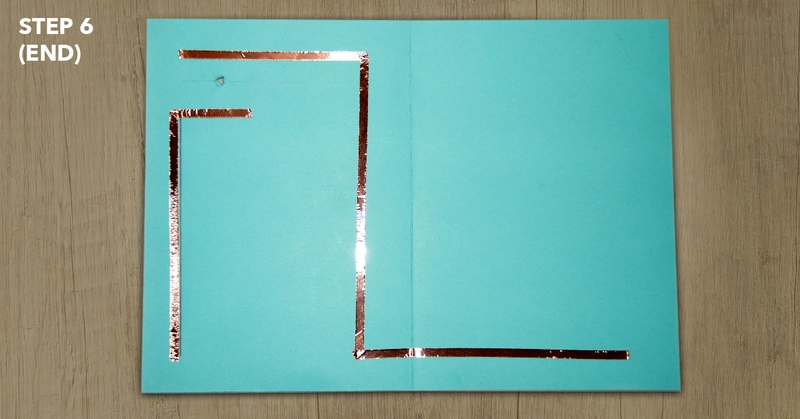
Remove the backing from the first 5cm of tape and stick the tape down along the line you drew. When you get to the corner, fold the tape upwards, in the 'wrong' direction, and fold it back down to continue along the path you drew. Repeat that process at the next corner so you have a continuous piece of copper tape running along the entire path you created in Step 3. Then do the same for the path you created in Step 4. Cut off any excess that you don't need.
Step 7
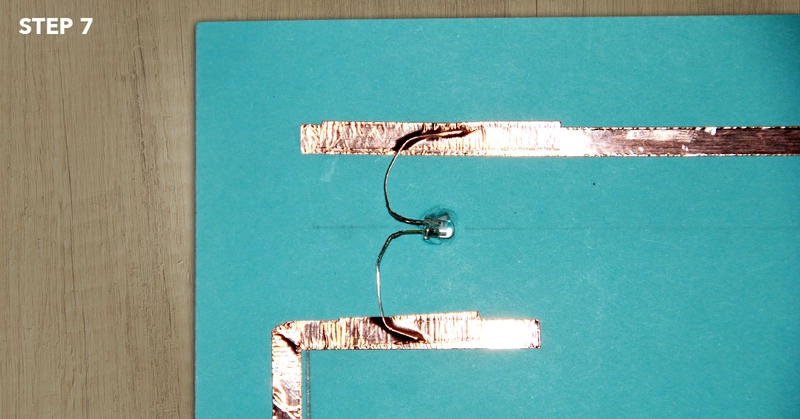
Now it's time to put the LED in place. The two wires, or electrodes, coming out of the LED are different lengths. The longer one is the positive Anode and the shorter one is the negative Electrode. Put the longer one on the section of copper tape that follows the line from Step 3. Bend the positive electrode carefully so it follows the copper tape you laid down and secure it with a 2cm piece of copper tape. Repeat the process with the negative electrode on the second section of copper tape following the lines from Step 4.
Step 8
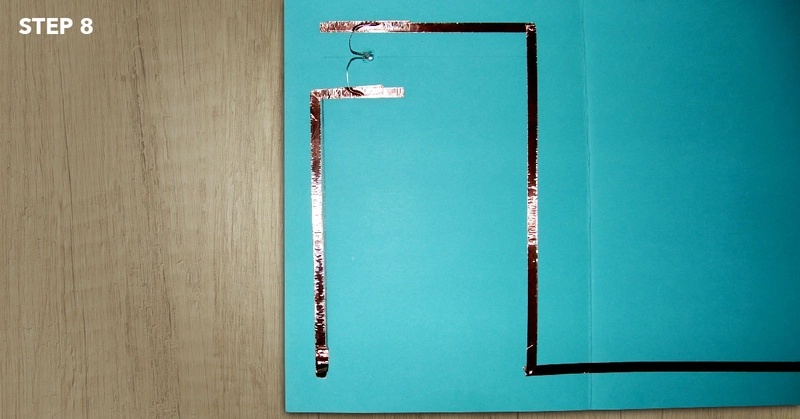
Cut a piece of 5cm-long copper tape with your scissors. Remove the backing from the tape and create a loop with the sticky side out. Place the loop on the copper tape that follows the path you created in Step 4, that has the negative electrode from the LED connected.
Step 9
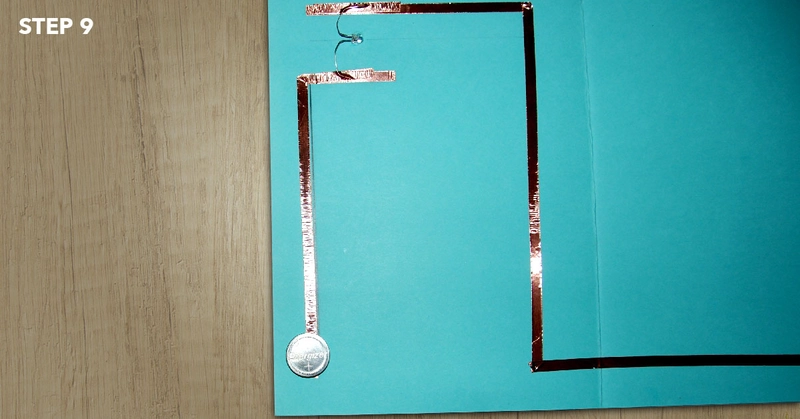
Take your CR2025 coin-sized battery and place it with the negative side down on the loop of tape you created in the previous step.
Step 10
Now it's time to test things out. Fold the card over. If you press down on the area above the battery, and everything is lined up correctly, the LED will light up.
Step 11
With everything working, it's time to add some final touches to the card. Place the second sheet of cardstock inside your card to cover up all the electronics and use the glue stick or double-sided tape to securely attach the two pieces of paper together. Then decorate the card using coloured pencils, textas, glitter, or anything else you like. As the LED will only light up if you press the battery down to complete the circuit, a small 'Press here' sign or symbol will help your Dad work out how to light up his Father's Day card.
